


Showing posts with label Android. Show all posts
Showing posts with label Android. Show all posts
Thursday, 30 October 2014
Tuesday, 30 April 2013
NEW CUSTOM ROM FIH-FB0 DEVICES a.k.a CSL Mi410, Axioo Vigo 410, Huawei IdeOS X6 & ETC
NEW CUSTOM ROM FIH-FB0 DEVICES a.k.a CSL Mi410, Axioo Vigo 410, Huawei IdeOS X6 & ETC:
1. [ROM] Taiwan Sharp SH8188U (STOCK 2.3.5):

download dimari fw-nya:
http://www*media*fire*com/?j9djb1jwbab4yxg
NB:
* Extract menggunakan 7zip, kemudian flashing dengan menggunakan SUT LR v1.8.2
* Hilangkan tanda *
* Thanks to ryo2456 @http://forum*xda-developers*com/showthread.php?t=1437512
2. [ROM] Andro-ID v3.3-RC3
Features:
- Android 2.3.5
- Deodexed
- Kernel 2.6.35.7
- VMSplit_3G
- OC up to 1.9 GHz*
- Using Vanilla Launcher2
- Using Vanilla Dialler
- Pre-Rooted
- Busybox enabled
- Init.d enabled
- Including CWM 5.0.2.7
- Custom Lockscreen**
- Some Cosmetic changes on UI
- Other enhancement feature
* CPU frequency is set to 1GHz at system boot to prevent boot failure.
** Experimental feature, can be removed if not stable


download dimari fw-nya:
http://download*andro-id*net/index*php?dir=FIH-FB0/&file=FB0G_Andro-ID_V3.3-RC3.7z
NB:
1. Hilangkan tanda *
2. Extract menggunakan 7zip, kemudian flashing dengan menggunakan SUT LR v1.8.2, pilih erase user data (dari rom MIUI) ke rc3, dan jangan lupa melakukan wiping cache dan data terlebih dahulu.
2. Katanya kalo mau
restore ROM nand hasil backup yg kemaren semisal dari rc2 atau MIUI
(backup via CWM) itu gak bakal bisa (bootloop), karena beda BASEBAND dan
BOOTLOADER
jadi kalo mau restore kudu SUT dulu balik ke RC1 (nb0), baru kemudian dipake recoverynya.
Tuesday, 23 April 2013
UnlockRoot is an easy one click Root/Unroot for most android devices
UnlockRoot is an easy one click Root/Unroot for most android devices starting from Android 2.1 till 4.0

This tool only grant root accsess and does not unlock simlock
This tool only grant root accsess and does not unlock simlock
Supported OS: WinXP/Vista/WIN7
How to Root Your Phone/Tablet :
- Your device must be in USB Debugging mode. To turn it on, go to Settings > Applications > Development and check the box.
- Connect your device to your PC, Run UnlockRoot.exe,
- Click “Unlock Root”, Enjoy!
Updates History :
v2.3.1 updates:
- -- Add Japanese and Korea.
- -- Fixed some error.
v2.3.0 updates:
- -- Support ICS deivec root (Galaxy Nexus, Transformer Prime, Motorola RAZR, Acer A200)
v2.2.2 updates:
- -- Support Kindel Fire 6.2.2
v2.2.1 updates:
-- Check device pre root state.
v2.2 updates:
- -- Support Kindel Fire 6.2.1 and lower.
- -- Support more pre-root devices.
v2.1 updates:
- -- Request administrator privileges
v2.0 updates:
- -- New interface, more beautiful.
- -- Support multi-language.
- -- Updated root method, Support more devices.
- -- Support ROM version before Android 2.1.
- -- Superuser.apk Update to ver.3.0.7.
cwm_recovery_6.0.1.2_a10.zip.
Working :
Code:
$ su
# cd /mnt/sdcard # sh
install-recovery.sh # sh
reboot-recovery.sh
Configuration :
note : you can open cwm recovery with turn off your tablet, and hold volume(+) with turn on/off button
CWM- cwm_recovery_6.0.1.2_a10.zip.
- Reboot
- Wipe data / factory reset
- Wipe Cache
- Install .zip
- Backup and Restore
- All buttons
- How to install :
- Download the recovery (recommended latest build)
- extract and put to your /sdcard
- open terminal applications (like better terminal emulator) ,or you can use from adb shell and type :
Code:
$ su
# cd /mnt/sdcard # sh
install-recovery.sh # sh
reboot-recovery.sh
Configuration :
- Power button : Select
- Volume (+) : Up
- Volume (-) : Down
- Go Back : please repeat volume (-) until get "Back Button Enabled" notification. (for build 27/July/2012)
note : you can open cwm recovery with turn off your tablet, and hold volume(+) with turn on/off button
CWM- cwm_recovery_6.0.1.2_a10.zip.
Saturday, 25 August 2012
[ Android Contacts Manager ] - How to manage Android Phone Contacts on Mac
Do you want to sync your Apple Address Book to your Android Phone? Are you trouble with adding a vCard from a web to your smartphone contacts? No matter what your demands are, the MobileGo for Android will help you to manage your smartphone contacts efficiently and easily.
This video tutorial will show you how to manage your smartphone contacts on Mac in an efficient way.
Video Demo:
Thursday, 23 August 2012
MX Video Player Pro v1.6j (Android)


Release Name : Mx Video Player Pro v1.6j Android
Size : 6.7 MB
Mx Player is the first Android video player that performs multi-core decoding. According to the test results on dual-core devices, it shows up to 70% performance improvement than single-core devices. Provides highly optimized codecs and Rendering Engines for the processors including ARM® NEON™ and NVIDIA® Tegra™ 2. Easily zoom in and out by pinching and swiping across screen. Scroll on subtitle text and playback position will be adjusted to match previous or next subtitle timing. Keep your kids entertained without having to worry about making calls or touching other apps. (plugin required). Fully supports Android 4.1 Jelly Bean.
Filefactory:
MX.Video.Player.Pro.v1.6j.Android.rar - download now for free. File sharing. Software file sharing. Free file hosting. File upload. FileFactory.com
Bitshare:
http://bitshare.com/files/ysap9ed2/M...droid.rar.html
Turbobit:
http://turbobit.net/8q22z0sw9pdy/Mx....droid.rar.html
Rapidgator:
Download file MX.Video.Player.Pro.v1.6j.Android.rar
Sunday, 19 February 2012
All HTC Roms Download
ELF
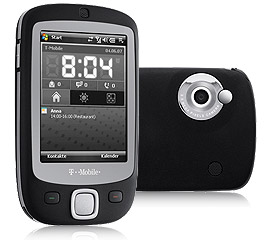
Also Known as
HTC P3450 / HTC Touch / HTC Ted Baker Needle / Orange & HTC Touch P3450 / Dopod S1 / T-Mobile MDA Touch / O2 Xda Nova / Vodafone VPA Touch
World Wide English [Shipped]
World Wide English Dopod Au [Shipped]
Russia [Shipped]
ELFIN
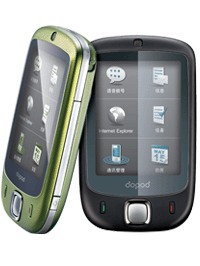
Also Known as
HTC P3452 / HTC Touch (Enhanced Version) / HTC Touch Color / Rogers & HTC Touch / Dopod S1 (Enhanced Version) / T-Mobile MDA Touch 256
World Wide English [India Shipped]
World Wide English [Australia Shipped][Dopod]
Orange UK [Dump]
Also Known as
HTC P3450 / HTC Touch / HTC Ted Baker Needle / Orange & HTC Touch P3450 / Dopod S1 / T-Mobile MDA Touch / O2 Xda Nova / Vodafone VPA Touch
World Wide English [Shipped]
World Wide English Dopod Au [Shipped]
Russia [Shipped]
ELFIN
Also Known as
HTC P3452 / HTC Touch (Enhanced Version) / HTC Touch Color / Rogers & HTC Touch / Dopod S1 (Enhanced Version) / T-Mobile MDA Touch 256
World Wide English [India Shipped]
World Wide English [Australia Shipped][Dopod]
Orange UK [Dump]
Wednesday, 15 February 2012
Step-by-step Tutorial Upgrading Cupcake 1.5 to Galaxo 1.6.3.3.[Galaxy i7500]
Upgrading Cupcake 1.5 to Galaxo 1.6.3.3. Step-by-step tutorial
Disclaimer:
I got most of this information in various forums, I don’t really
remember all of them, but there are some places that you should go visit
cause they are full of useful information.The first is http://www.drakaz.com/
that’s where the Galaxo ROM came from. Check their download section for
newer ROMS (2.1 coming soon) and stuff, plus those guys are awesome;
you should support them if you can. Then we have http://androidforums.com, http://www.androidwiki.de and http://www.iandroid.co.il, lots of good information can be found there.
Also, this process will probably void your warranty and could potentially brick your phone (as in, render it completely useless). I do not assume any responsibility for anything that happens to your phone, follow this tutorial under your own risk. (I must say though, if you follow the instructions properly, everything should be fine).
Also, this process will probably void your warranty and could potentially brick your phone (as in, render it completely useless). I do not assume any responsibility for anything that happens to your phone, follow this tutorial under your own risk. (I must say though, if you follow the instructions properly, everything should be fine).
And now on with the tutorial!
Background:
So I recently acquired a Samsung Galaxy i7500 from Orange in Israel. But because Google hasn’t written their own Hebrew support, the cellular companies here in Israel developed their own code together with Samsung Israel (menus, keyboard, fonts, etc.). The problem is that they are keeping the Hebrew code to themselves and are not planning on sharing it or releasing any updates for the software (I called Samsung Israel and they confirmed that the only software they support and will support, is the pre-installed Cupcake 1.5). Why would they help you in any way? Since you’re “depending” on their software for Hebrew support, they can just “make you” buy a newer phone… or so they thought!
So I recently acquired a Samsung Galaxy i7500 from Orange in Israel. But because Google hasn’t written their own Hebrew support, the cellular companies here in Israel developed their own code together with Samsung Israel (menus, keyboard, fonts, etc.). The problem is that they are keeping the Hebrew code to themselves and are not planning on sharing it or releasing any updates for the software (I called Samsung Israel and they confirmed that the only software they support and will support, is the pre-installed Cupcake 1.5). Why would they help you in any way? Since you’re “depending” on their software for Hebrew support, they can just “make you” buy a newer phone… or so they thought!
I looked around in hundreds (literally) of forum posts and tutorials
trying to figure out, first, how to “get root” so I could try to
uninstall all the useless and unrequested software that came
pre-installed and locked into the phone.
There I started to learn about upgrading the phone to Donut 1.6, but still, Hebrew was not supported. After reading many different confusing posts on the Israeli Android forum (www.iandroid.co.il) I found some posts that were actually helpful.
There I started to learn about upgrading the phone to Donut 1.6, but still, Hebrew was not supported. After reading many different confusing posts on the Israeli Android forum (www.iandroid.co.il) I found some posts that were actually helpful.
Here, you will find my simple step by step tutorial for dummies on how to upgrade your Cupcake 1.5 to Donut 1.6 (Galaxo 1.6.3.3), how to add Hebrew support (not for menus, only for reading/writing Hebrew and to send/receive sms) and restore your 3G internet connection provided by Orange Israel.
Please
download all the files to your computer before you start doing anything.
Once you have all the files you can be sure you can proceed.
STEP 1 (ADB drivers):
You need to install the ADB drivers (Android Debug Bridge). You’ll need those to operate the Android SDK correctly. – Terminology
is unimportant; just follow this tutorial step by step and you’ll be
fine, but I’ll try to give you details so you know what is going on.
Download the drivers here and extract the folder (“usb_driver”) to your desktop.
- When I first tried to do this, I did it in my “state-of-the-art” DualCore @3.2Ghz, 6GB RAM, Windows7 Ultimate 64bit computer. Only to find out that the 64bits Windows versions (XP, Vista, Server and 7) have problems recognizing these drivers. It can still be done, but it requires a lot more effort (look here for help). So my recommendation is: Do this in a 32 bit Windows!
I’m using Windows 7 32 bits (x86), so I’ll continue this tutorial
assuming you have the same operating system… it should be very similar
(if not identical) to other 32bits versions of Windows.
Go to your Galaxy, go into the Settings, select Applications, then
Development, then tick USB debugging. Now plug it into your computer.
Some drivers will automatically install, give it some time until the
little window that scans for drivers is done doing its thing.
Open up the device manager.

You should see an unknown device with a yellow exclamation mark. Right-click it and select update drivers.

Select “Browse my computer”.

Select “Let me pick from a list of device drivers on my computer”.

If you see a list of devices and you have to pick one, don’t select
any and just click next again. Then, click “Have Disk”. Browse to the
“usb_driver” folder that you put on your desktop before, then select the
x86 folder (which means 32-bits) and in it select “android_usb.inf”.
Your device should now have the required drivers.
If you still have problems with your computer recognizing your phone, don’t worry, we still have options:
1. Install “Samsung New PC Studio”, that will install some more drivers that could help.
2. Download
and install “Droid Explorer”, that will also install more drivers and
it’s an AWESOME program (explore root files, install/uninstall apps,
backup, screenshots, etc.).
3. Download more drivers here – These are other drivers that I found around the internet, I don’t know exactly which one worked for me, but one of them did.
STEP 2 (Placing the Recovery, Update and .tar files)
You’re going to need these files:
- The Android SDK: Download the Android SDK | Android Developers
- This Donut firmware: I7500XEFJB2 I7500XEJC6 - used to restore Google Apps
- The custom recovery (4.6.3): http://www.drakaz.com/FILES/GALAXY/?file=RECOVERY_4.6.3.zip (used to apply the update, among other stuff) - Alternatively go to http://www.drakaz.com/download/ to obtain the newest release.
- Galaxo 1.6.3.3: http://www.drakaz.com/FILES/GALAXY/?file=Galaxo_V1.6.3.3.zip
I suggest saving all of those to the desktop, to avoid confusion.
- Start by placing the
“android-sdk-windows” folder on the root of your C: drive. The place
doesn’t really matter, but you’ll have to type the path into a command
prompt later, so if you follow my example, place it in the root of your
C: drive.
- Extract the files located inside
the “RECOVERY_4.6.3.zip” file. You now have “recovery.img” and
“RECTOOLS.tar.gz”. Take “recovery.img” and place it in the “tools”
folder of the “android-sdk-windows” folder (ie:
C:\Android-sdk-windows\tools\).
- Now, rename “Galaxo_V1.6.3.3.zip” to “update.zip”.
- Then, extract “Samsung.tar” from “I7500XEFJB2.zip” “I7500XEJC6.zip”.
- Connect your phone to the
computer via usb, pull the dropdown notifications menu and click on
“Select to copy fies to/from your computer”. Now in your computer open
the file manager (My Computer) and you should see 2 new drives. They are
the internal and external sd cards of your Galaxy.
- Take “update.zip”, “Samsung.tar” and “RECTOOLS.tar.gz” (the last one was in RECOVERY_4.6.3.zip), and place them on the root folder of both drives (SD cards). Do not put these files inside any folder.
STEP 3 (Flashing Firmware with Odin)
1. Download Odin Multi Downloader 3.98 from here. Extract the 2 files to the same directory where you’ve been putting all the files.
To check if your phone is being recognized by your computer and that
the Windows drivers are working as they should, follow these steps:
1. Open a Command Prompt (Windows key + R, type cmd and press enter; or Click
on the Windows “start” button, click on “run” and type “cmd” and press
enter; or search for “cmd” in the start menu and click on “cmd.exe”)
2.
Go to the directory where the SDK is located (usually
C:\android-sdk-windows\tools\) and with your phone connected through the
usb cable, type “adb devices” and press enter.
If everything is working, you should see a message like this:
List of devices attached
I7500xxxxx device
If you don’t see this message, there probably is a problem with the drivers, go back to Step 1.
I7500xxxxx device
If you don’t see this message, there probably is a problem with the drivers, go back to Step 1.
2. Now open Odin Multi Downloader as administrator (right click on the .exe and select run as administrator – if you don’t do this, it won’t work.)
You should see on the Message box the following messages:
<1> Added!!!
<1> Detected!!!
<1> Added!!!
<1> Detected!!!
- Click on OPS and select the Orion.ops file that was included in the Odin_3.98.rar file.
- Click on BOOT and select the I7500XEJC6-BOOTLOADER-CL209906.tar file (extracted from I7500XEJC6.zip)
- Click on PHONE and select the I7500XEJC6-PHONE-CL209906.tar file (extracted from I7500XEJC6.zip)
- Click on PDA and select the I7500XEJC6-PDA-CL209906.tar file (extracted from I7500XEJC6.zip)
- Click on CSC and select the I7500SERJC6-CSC-CL209906-SER.tar file (extracted from I7500XEJC6.zip)

3. Now shut down your phone, make sure it’s connected to your computer via USB.
4.
Start your phone in “Download Mode” by pressing and holding the “Volume
down, OK and Power” buttons. You should see an SD card blue icon and a
message that says “Downloading”.
In Odin, look at the Message box, it should say again
<1>Added!!!
<1>Detected!!!
<1>Added!!!
<1>Detected!!!
5. Press the START button on Odin
- If the phone seems to be stuck in the Samsung logo (more than 7 or 8 minutes), do not worry! Take out the battery and restart the phone, leave it connected to the usb and let it restart. If you’re still stuck, restart the phone in recovery mode (press and hole Volume down, Answer and Power buttons while turning on phone.) When you see a triangle icon with an “!”, press the “menu” button. The phone will perform a Wipe and then restart.
Let the phone restart and you should see STATUS OK in the Message box of Odin.
6. Now you have the newest Firmware version on your phone… but that’s not enough, time to get Galaxo!!! (You
may notice your phone is in Russian at this point, do not worry, it’s
just the default Locale of this ROM. No need to change it because we’re
about to install Galaxo on top of it).
STEP 4 (Recovery and update)
1. Power off your phone and leave it connected via USB.
2. Open a Command Prompt (Windows
key + R, type cmd and press enter; or Click on the Windows “start”
button, click on “run” and type “cmd” and press enter; or search for
“cmd” in the start menu and click on “cmd.exe”).
3. Go to the directory where the SDK is located (usually
C:\android-sdk-windows\tools\). If you didn’t put the Android SDK on
the root of your C: drive, you’ll have to modify this line and put the
actual path.
Now type “fastboot flash recovery recovery.img” without pressing enter just yet (notice that the word “recovery” appears twice – I almost got stuck here myself for not paying attention.)

4.
Boot your phone into fastboot mode, to do so press and hold both the
Call button (bottom left) and Power button (bottom right) keys at the
same time, until you see on the phone that you are in fastboot mode.
You’ll have about 15 seconds to press enter on the command prompt on the
computer. If it works, you’ll see a message like the one on the image
below. If it doesn’t work then you just see the “waiting for device”
message on the command prompt; your phone will automatically restart
after 15 seconds into normal mode. You’ll have to power down and repeat.
If things are working as they should, you should see this in the command prompt window:

- When I tried to do this the first time, it wouldn’t do anything, just reboot. It would wait for the device, then my Galaxy would boot normally. To solve this, open the device manager on your computer and turn the Galaxy off again. You are going to boot into fastboot mode again (press and hold the call and power buttons), you’ll have about 15 seconds to check the device manager (open it beforehand), and see if there’s a new device that needs drivers. Mine was Android 1.0 (with a yellow exclamation mark, meaning that there are no drivers). You’ll do the exact same thing as you did with the ADB driver, using the exact same driver (right click the unknown device, select: “update the driver”, “select from a list”, “next”, “Have disk”, “Browser”, then find the same “android_usb.inf”. Check the beginning of the guide if you don’t remember what to do.)
- Tip: copy the path of the
“usb_driver” path (C:\Users\Name\Desktop\usb_driver) to your clipboard,
that way you can just paste it when you’re looking for the file, instead
of having to browse to get to the driver folder.
5.
Next step is to boot again, but this time in recovery mode. To do so,
press and hold the “Lower volume button”, the “Call button” and the
“Power button”. If it works, you’ll see a green menu with lots of
choices. You’ll be done in 4 more steps:
1.
Select “Wipe data/Factory reset”. It’s going to erase all your applications and settings, but it shouldn’t touch anything saved on your
SD card (such as pictures, music, saves, etc). It’s important to do this; otherwise the phone will not work properly.
2. Select “Apply sdcard:update.zip”. – This step will install Galaxo on your phone.
3. Select “Restore G.Apps”. - This will install the Google Applications on your phone.
4. Reboot and enjoy your new Galaxo!
If the phone gets stuck on the Android screen, wait for about 10
minutes, and then if it’s still stuck, pull out the battery and boot
again. If it still doesn’t work, you can try again, or boot into
recovery and try to “apply the sdcard:update.zip” again and restoring
the Google apps rebooting between, and trying another wipe after that.
Look for more help on www.androidforums.com
Tuesday, 14 February 2012
Odin Multi Flasher Downloader For All version Samsung Android phone

Apakah Odin Odin multi Downloader ini? Alat program perangkat lunak yang digunakan untuk flash Firmware (ROM atau saham baik ROM Custom) pada perangkat Samsung yang berjalan di OS Android. . Ini biasanya termasuk dalam paket Firmware, ia datang dengan versi yang berbeda dan dibangun untuk digunakan dalam produk Android yang diinginkan Samsung Telepon.
Di bawah ini adalah daftar Odin Downloader Versi Multi dan apa Samsung perangkat yang akan digunakan untuk ...
Odin multi Downloader v1.70
Samsung I9000 Galaxy S, Samsung I9010 Galaxy S, Samsung Galaxy Tab P1000, Samsung Galaxy Tab wifi P1010, Samsung I9010 Galaxy S Giorgio Armani
Odin multi Downloader v1.81
Odin multi Downloader v1.82
Odin multi Downloader v1.83
Samsung Galaxy S I9000, Samsung Galaxy S II I9000, Samsung I9003 Galaxy SL, Samsung Galaxy Giorgio Armani I9010, Samsung Google Nexus S I9020, Samsung Google Nexus S i9020A, Samsung Google Nexus S i9023, Samsung Galaxy Tab P1000, Samsung Galaxy Tab P1010 wifi ,
Samsung Galaxy Catatan N7000
Odin multi Downloader v1.84
Samsung Galaxy Y S5360, Samsung S5363 Galaxy Y
Odin multi Downloader v1.85
Samsung Galaxy S II i9100, Samsung Galaxy S II I9100G, Samsung Galaxy S II I9100P, Samsung Galaxy Tab 10.1v P7100, Samsung Galaxy Y S5360, Samsung Galaxy Y S5363, Samsung Galaxy Tab wifi P1010, Samsung Galaxy Tab 8,9 P7300, Samsung Galaxy Tab10 .1 P7500, Samsung Galaxy Tab 10,1 WiFi P7510, Samsung Galaxy Y Pro B5510, Samsung Galaxy Catatan N7000.
USA & Kanada pembawa bermerek (Tidak semua diuji)
Samsung Galaxy S II SGH-I727 meroket
Samsung Galaxy S II LTE SGH-I727R
Samsung Galaxy S II SGH-I777
Samsung SGH-i857 DoubleTime
Samsung Captivate Glide SGH-i927
Samsung Galaxy S Glide SGH-i927R
Samsung Galaxy Tab 8,9 LTE SGH-i957
Samsung Infuse 4G SGH-I997
Samsung SGH-T499 Dart
Samsung Gravity Cerdas SGH-T589
Samsung Galaxy Q SGH-T589R
Samsung Galaxy Tab 7.0 Ditambah SGH-T869
Samsung Galaxy S Fascinate 4G SGH-T959P
Samsung SGH-T989 Hercules
SCH-i500 memikat
SPH-M820 Menang
SPH-M910 Intercept
SCH-R880 Acclaim
SCH-R910 Manjakan
SGH-I897 Captivate
SGH-I997 Infus
SGH-T589 Gravity
SGH-T839 Sidekick
SGH-T959 Vibrant
SGH-T959v Galaxy S 4G
SPH-D700 Epic 4G
SPH-D720 Nexus S 4G
SPH-M580 Mengganti
SPH-M920 Transform
SCH-I400 Contunuum
SCH-i500 Fascinate
SCH-I510 Droid Biaya
SGH-i917 Fokus
Odin multi Downloader v3.98
Samsung I7500 Galaxy,
Odin multi Downloader v4.03
Samsung T919 Lihatlah, Samsung T939 Lihatlah 2
Odin multi Downloader v4.16
Samsung I7500 Galaxy,
Odin multi Downloader v4.252
Samsung I5800 Galaxy Apollo, Samsung I5700 Galaxy Spica, Samsung Galaxy I7500
Odin multi Downloader v4.28
Odin multi Downloader v4.34
Samsung i5500 Europa, Samsung I5500 Galaxy Europa, Samsung Galaxy 551 i5510, Samsung I5700 Galaxy Spica, Samsung I5800 Galaxy Apollo, Samsung I7500 Galaxy,
Odin multi Downloader v4.38
Odin multi Downloader v4.42
Samsung Galaxy Gio S5660, Samsung Galaxy Mini S5570, Samsung Galaxy Fit S5670, Samsung Galaxy Ace S5830, Samsung Galaxy Xcover S5690, Samsung Galaxy Y Pro B5510, Samsung Galaxy Pro B7510, Samsung Galaxy M Pro B7800
Odin multi Downloader v4.43
Samsung I9001 Galaxy S Plus, Samsung Galaxy W I8150, Samsung Bukti II 4G T679 (T-Mobile), Samsung Galaxy W T679M (Bell).
Odin Pit dan File Ops:
Smartphone Android
Samsung Galaxy Y Pro B5510 - link Luisa_0623.pit
Samsung Galaxy Pro B7510 - BENNETT_v1.0.ops Link
Samsung Galaxy M Pro B7800 -
Samsung I5500 Galaxy Europa - EUROPA_v1.0.ops Link
Samsung Galaxy 551 i5510 - CALLISTO.OPS Link
Samsung Galaxy Spica I5700 - spica_jc3.ops Link
Samsung I5800 Galaxy Apollo - apollo_0531.ops, 531.OPS Link
Samsung I6500 Galaxy Saturnus -
Samsung I7500 Galaxy - Orion.ops Link
Samsung I8150 Galaxy W-Ancora.OPS Link
Samsung Galaxy Beam I8520 -
Samsung Galaxy S I9000 - s1_odin_20100512.pit, s1_odin_20100513.pit, s1_odin_20100803.pit Link
Samsung I9001 Galaxy S Plus - AriesVE.ops Link
Samsung Galaxy SL (LCD) I9003 - latona_20110114.PIT Link
Samsung Armani Galaxy S I9010 - GA3_add_hidden.pit Link
Samsung Nexus S I9020 -
Samsung Nexus SL (LCD) I9023 -
Samsung i9100 Galaxy S II - u1_02_20110310_emmc_EXT4.pit Link
Samsung Galaxy S II Tegra I9103 -
Samsung I9210 Galaxy Celox -
Samsung Nexus Perdana I9250 - partition_table_0915.pit Link
Samsung Galaxy Catatan N7000 - Q1_20110914_16GB.PIT Link
Samsung Galaxy Y S5360 - totoro_0623.pit Link
Samsung Galaxy Mini S5570 - TASS.OPS Link
Samsung Galaxy Gio S5660 - GIO_v1.0.ops Link
Samsung Galaxy Fit S5670 - BENI_V1.0.OPS Link
Samsung Galaxy Ace S5830 - COOPER.OPS Link
Samsung Epic 4G D700 - kemenangan 8G_100528.pit.rar Link
Android Tablet
Samsung Galaxy Tab P1000 - P1_EUR_20100816.pit, Pit-909.pit,
EUR.pit, P1.pit, gt-p1000_mr.pit Link
Samsung Galaxy Tab Wifi P1010-p1wifi_20110128_r10_00.pit Link
Samsung Galaxy Tab 7,0 P6200 -
Samsung Galaxy Tab 7,0 Wifi P6210-
Samsung Galaxy Tab 10.1v P7100 -
Samsung Galaxy Tab 8,9 P7300 - P5.PIT Link
Samsung Galaxy Tab 8,9 Wifi P7310 - P5.PIT Link
Samsung Galaxy Tab 10,1'' P7500 - android_fastboot_emmc_full_p4_16G_32G.pit Link
Samsung Galaxy Tab 10,1'' wifi P7510 - android_fastboot_emmc_full_p4_16G_32G.pit Link

Friday, 10 February 2012
Android Kode_Android™ Hidden Secret Codes
*#*#4636#*#*
Menampilkan Informasi Phone, Baterai, Penggunaan Baterai, Statistik Penggunaan HP Android.
*#*#7780#*#*
Menghapus/Meng-reset Data Pabrik. Menghapus Akun Google yang tersimpan di Android, Sistem dan Data Aplikasi dan Pengaturan dan Aplikasi yang di Download. Tetapi tidak menghapus file SD Card dan Aplikasi yang ada di Android.
Ketika menggunakan code ini akan muncul PopUp untuk meyakinkan anda menghapus atau tidak. Jadi bisa di cancel
*2767*3855#
Kode ini digunakan untuk Format Pabrik. Menghapus semuanya dan reinstall firmware HP android. Tidak dapat di Cancel, jadi jangan gunakan Code ini..
*#*#34971539#*#*
Menampilkan informasi untuk Camera. Menampilkan menu Update Firmware Camera dalam Gambar, dalam SD, data Firmware Camera, dan update firmware. Jangan pilih opsi pertama karena akan merusak Camera HP android anda.
*#*#7594#*#*
Kode ini mengubah tombol End Call/Power di Hp Android anda. Jika ditahan tombol nya akan menampilkan opsi Mode Silent, Airplane Mode dan Power Off.
*#*#273283*255*663282*#*#*
Kode ini membuka File copy screen dimana anda dapat backup file media anda.
*#*#197328640#*#*
Kode ini digunakan untuk masuk ke mode Service. Untuk mengubah pengaturan Mode Servis seperti WLAN, GPS dan BLuetooth.
*#*#232339#*#* atau *#*#526#*#* atau *#*#528#*#*
Mengetes WLAN, gunakan tombol Menu untuk memulai tes.
*#*#232338#*#*
Menampilkan alamat MAC WiFi Android anda.
*#*#1472365#*#* atau
*#*#1575#*#*
Tes GPS
*#*#232331#*#*
Tes Bluetooth
*#*#232337#*#
Menampilkan alamat Bluetooth Android anda.
*#*#8255#*#*
Menampilkan GTalk Service Monitor.
*#*#4986*2650468#*#*
PDA, Phone, H/W, RFCallDate
*#*#1234#*#*
PDA danPhone
*#*#1111#*#*
FTA SW Versi
*#*#2222#*#*
FTA HW Versi
*#*#44336#*#*
PDA, Phone, CSC, Build Time, Changelist number
Kode untuk melakukan tes Pabrik Android
*#*#0283#*#*
Packet Loopback
*#*#0*#*#*
tes LCD
*#*#0673#*#* OR *#*#0289#*#*
tes Melodi
*#*#0842#*#*
Vibration dan Backlight tes
*#*#2663#*#*
Touch screen version
*#*#2664#*#*
Touch screen test
*#*#0588#*#*
Proximity sensor test
*#*#3264#*#*
RAM version
Menampilkan Informasi Phone, Baterai, Penggunaan Baterai, Statistik Penggunaan HP Android.
*#*#7780#*#*
Menghapus/Meng-reset Data Pabrik. Menghapus Akun Google yang tersimpan di Android, Sistem dan Data Aplikasi dan Pengaturan dan Aplikasi yang di Download. Tetapi tidak menghapus file SD Card dan Aplikasi yang ada di Android.
Ketika menggunakan code ini akan muncul PopUp untuk meyakinkan anda menghapus atau tidak. Jadi bisa di cancel
*2767*3855#
Kode ini digunakan untuk Format Pabrik. Menghapus semuanya dan reinstall firmware HP android. Tidak dapat di Cancel, jadi jangan gunakan Code ini..
*#*#34971539#*#*
Menampilkan informasi untuk Camera. Menampilkan menu Update Firmware Camera dalam Gambar, dalam SD, data Firmware Camera, dan update firmware. Jangan pilih opsi pertama karena akan merusak Camera HP android anda.
*#*#7594#*#*
Kode ini mengubah tombol End Call/Power di Hp Android anda. Jika ditahan tombol nya akan menampilkan opsi Mode Silent, Airplane Mode dan Power Off.
*#*#273283*255*663282*#*#*
Kode ini membuka File copy screen dimana anda dapat backup file media anda.
*#*#197328640#*#*
Kode ini digunakan untuk masuk ke mode Service. Untuk mengubah pengaturan Mode Servis seperti WLAN, GPS dan BLuetooth.
*#*#232339#*#* atau *#*#526#*#* atau *#*#528#*#*
Mengetes WLAN, gunakan tombol Menu untuk memulai tes.
*#*#232338#*#*
Menampilkan alamat MAC WiFi Android anda.
*#*#1472365#*#* atau
*#*#1575#*#*
Tes GPS
*#*#232331#*#*
Tes Bluetooth
*#*#232337#*#
Menampilkan alamat Bluetooth Android anda.
*#*#8255#*#*
Menampilkan GTalk Service Monitor.
*#*#4986*2650468#*#*
PDA, Phone, H/W, RFCallDate
*#*#1234#*#*
PDA danPhone
*#*#1111#*#*
FTA SW Versi
*#*#2222#*#*
FTA HW Versi
*#*#44336#*#*
PDA, Phone, CSC, Build Time, Changelist number
Kode untuk melakukan tes Pabrik Android
*#*#0283#*#*
Packet Loopback
*#*#0*#*#*
tes LCD
*#*#0673#*#* OR *#*#0289#*#*
tes Melodi
*#*#0842#*#*
Vibration dan Backlight tes
*#*#2663#*#*
Touch screen version
*#*#2664#*#*
Touch screen test
*#*#0588#*#*
Proximity sensor test
*#*#3264#*#*
RAM version
All Other
1. Memeriksa layar sentuh kode: *#*#0*#*#*
kode ini untuk LCD test, periksa dan liat,, bisa ketauan kalo ada dead pixel. tau dead pixel kan?? kalo ada yang gak tau tanya aja sama yosep. ntar di tes ada gak yang bermasalah di beberapa titik layar.
2. Menguji layar sentuh, kode: *#*#2664#*#*
nanti langsung gelap... lalu di sentuh aja deh... coba di usap2.. jangan sampe putus.. kalo ada yang putus berarti bermasalah layarnya.. bisa di coba juga dengan kode: *#*#2663#*#*
3. Menguji speaker, kode: *#*#0673#*#* atau *#*#0289#*#*..
ya coba aja satu2, dan pilih speker mana yang mau di coba.. kalo normal semua speker bunyi kalo gak bunyi ya nasib...
4. Menguji kekuatan getar, kode: *#*#0842#*#*
5. Servis mode, kode: *#*#197328640#*#*
ini salah satu test yang penting... susah diinget memang kodenya tapi kalo udah ini aja gampang menyatakan ketertarikan kita... soalnya ada uji WIFI, BLUTUT, GPS, audio...
6. Kode: *#*#4636#*#*
informasinya banyak nih dan berguna,, ada keausan kondisi batere, voltase temperature, lalu ada ionfo teknologi yang digunakan...
7. *#*#7262626#*#*
Uji Lapangan Tidak didukung oleh semua unit, akan menampilkan daftar pilihan bagi untuk menguji dan ada pilihan untuk log informasi juga.
8. *#*#8351#*#*
Dialer Login Diaktifkan Catatan 20 panggilan terakhir kita dan menyimpannya pada telepon kita, kita dapat menemukan data di / data berikut / data / com.android.voicedialer / app_logdir
kode ini untuk LCD test, periksa dan liat,, bisa ketauan kalo ada dead pixel. tau dead pixel kan?? kalo ada yang gak tau tanya aja sama yosep. ntar di tes ada gak yang bermasalah di beberapa titik layar.
2. Menguji layar sentuh, kode: *#*#2664#*#*
nanti langsung gelap... lalu di sentuh aja deh... coba di usap2.. jangan sampe putus.. kalo ada yang putus berarti bermasalah layarnya.. bisa di coba juga dengan kode: *#*#2663#*#*
3. Menguji speaker, kode: *#*#0673#*#* atau *#*#0289#*#*..
ya coba aja satu2, dan pilih speker mana yang mau di coba.. kalo normal semua speker bunyi kalo gak bunyi ya nasib...
4. Menguji kekuatan getar, kode: *#*#0842#*#*
5. Servis mode, kode: *#*#197328640#*#*
ini salah satu test yang penting... susah diinget memang kodenya tapi kalo udah ini aja gampang menyatakan ketertarikan kita... soalnya ada uji WIFI, BLUTUT, GPS, audio...
6. Kode: *#*#4636#*#*
informasinya banyak nih dan berguna,, ada keausan kondisi batere, voltase temperature, lalu ada ionfo teknologi yang digunakan...
7. *#*#7262626#*#*
Uji Lapangan Tidak didukung oleh semua unit, akan menampilkan daftar pilihan bagi untuk menguji dan ada pilihan untuk log informasi juga.
8. *#*#8351#*#*
Dialer Login Diaktifkan Catatan 20 panggilan terakhir kita dan menyimpannya pada telepon kita, kita dapat menemukan data di / data berikut / data / com.android.voicedialer / app_logdir
Tuesday, 31 January 2012
Monday, 2 January 2012
Android Phones - Hard Reset
HTC Dream
1. Turn the G1 off. If it’s frozen on, take the battery out and put it back in the unit.
2. Hold the Home and Power keys down at same time for about 25 seconds. You will see a yellow triangle screen with exclamation point in the
middle.
Now to wipe the device clean:
3. Press Alt+L.
4. Press Alt+W for a factory reset.
5. Press the Home and Back keys again for about 25 seconds.
The device should then reset again and the hard reset is complete.
++++++++++++++++++++++++++++++++++++++++++++++++++
2. Hold the Home and Power keys down at same time for about 25 seconds. You will see a yellow triangle screen with exclamation point in the
middle.
Now to wipe the device clean:
3. Press Alt+L.
4. Press Alt+W for a factory reset.
5. Press the Home and Back keys again for about 25 seconds.
The device should then reset again and the hard reset is complete.
++++++++++++++++++++++++++++++++++++++++++++++++++
Wednesday, 21 December 2011
Samsung Android Factory Reset & Service Test Code
- *#*#4636#*#* - Phone Information
- *2767*3855# - Hard Reset
- *#*#7780#*#* - Factory Reset
- *#*#7594#*#* - Change End Call/Power Option
- *#*#197328640#*#* - Service Mode
- *#*#273283*255*663282*#*#* - File Copy Screen (Backup Media Files)
- *#*#526#*#* - WLAN Test
- *#*#232338#*#* - Shows WiFi MAC address
- *#*#1472365#*#* - GPS Test
- *#*#1575#*#* - Another GPS test
- *#*#232331#*#* - Bluetooth test
- *#*#232337#*# - Shows Bluetooth device address
- *#*#8255#*#* - GTalk Service Monitor
Tuesday, 20 December 2011
Android PC Suite 1.7.13.270
Android PC Suite 1.7.13.270

Android PC Suite - has been developed by the Pandaap team to provide all the Android users a free and very good alternative to other Android applications. It fully supports all the phones running with Android OS. Main features include:
- Windows XP/Vista/Win7 64 OS support
Read More...........


